In Android, you can use “android.widget.ImageButton” to display a normal “Button“, with a customized background image.
In this tutorial, we show you how to display a button with a background image named “android_button.png“, when user click on it, display a short message. As simple as that.
You may also like this Android ImageButton selector example, which allow to change button’s images depends on button states.
P.S This project is developed in Eclipse 3.7, and tested with Android 2.3.3.
1. Add Image to Resources
Put image “android_button.png” into “res/drawable-?dpi” folder. So that Android know where to find your image.
2. Add ImageButton
Open “res/layout/main.xml” file, add a “ImageButton” tag, and defined the background image via “android:src“.
File : res/layout/main.xml
<?xml version="1.0" encoding="utf-8"?>
<LinearLayout xmlns:android="http://schemas.android.com/apk/res/android"
    android:layout_width="fill_parent"
    android:layout_height="fill_parent"
    android:orientation="vertical" >

    <ImageButton
        android:id="@+id/imageButton1"
        android:layout_width="wrap_content"
        android:layout_height="wrap_content"
        android:src="@drawable/android_button" />

</LinearLayout>
3. Code Code
Here’s the code, add a click listener on image button.
File : MyAndroidAppActivity.java
package com.mkyong.android;

import android.app.Activity;
import android.os.Bundle;
import android.widget.ImageButton;
import android.widget.Toast;
import android.view.View;
import android.view.View.OnClickListener;

public class MyAndroidAppActivity extends Activity {

	ImageButton imageButton;

	@Override
	public void onCreate(Bundle savedInstanceState) {
		super.onCreate(savedInstanceState);
		setContentView(R.layout.main);

		addListenerOnButton();

	}

	public void addListenerOnButton() {

		imageButton = (ImageButton) findViewById(R.id.imageButton1);

		imageButton.setOnClickListener(new OnClickListener() {

			@Override
			public void onClick(View arg0) {

			   Toast.makeText(MyAndroidAppActivity.this,
				"ImageButton is clicked!", Toast.LENGTH_SHORT).show();

			}

		});

	}

}
4. Demo
Run the application.
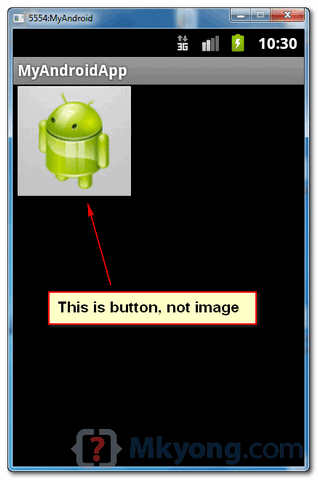
1. Result, a button with a customized background image.
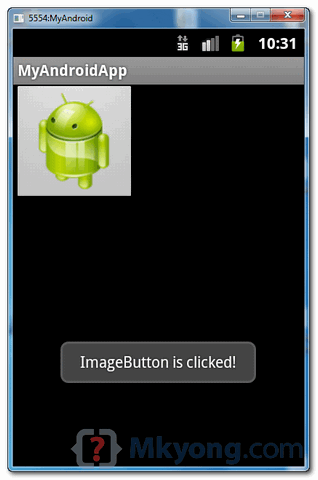
2. Click on the button, a short message is displayed.

Can you please help me how to add but i want to different pages in one page of android recipe
Please I am new to android….
how to take a image button array…..plz give me example……
Thanks so much,it even works for AIDE!
Many Thanks!!!
very helpful…thx
When i make a imagebutton the image (png file) seems low quality and with a padding inside the button, there’s a way to make it exactly of the size of the png image and without that padding? Thank you so much.
Awesome blog! Is your theme custom made or did you download it from
somewhere? A design like yours with a few simple adjustements would really make my blog shine.
Please let me know where you got your design. Thanks a lot
This info saved me a lot of time. I was originally trying to assign a view with a drawable to a Button, but it obviously wasn’t working. So, thanks a ton for posting this example source code for an ImageButton.
This information saved me a lot of time. It worked perfectly. Thanks for posting this.
Can you please help me how to add imagebutton dynamically in my activity…
Please I am new to android….
 public class Mp3Player extends Activity implements OnClickListener {

    @Override
    public void onCreate(Bundle savedInstanceState) {

 ImageButton ib1=(ImageButton) findViewById(R.id.Playbutton);
 ImageButton ib2=(ImageButton) findViewById(R.id.Pausebutton);
 ImageButton ib3=(ImageButton) findViewById(R.id.Forwardbutton);
 ImageButton ib4=(ImageButton) findViewById(R.id.Rewindbutton);


 ib1.setOnClickListener(this);

        super.onCreate(savedInstanceState);
        setContentView(R.layout.activity_mp3_player);
    }

    @Override
    public boolean onCreateOptionsMenu(Menu menu) {
        getMenuInflater().inflate(R.menu.activity_mp3_player, menu);
        return true;
    }

	@Override
	public void onClick(View arg0) {
		// TODO Auto-generated method stub

		switch(arg0.getId()) {
		case R.id.Playbutton:
			Log.d("MediaPlayer", "Play button was clicked");
			break;

		case R.id.Pausebutton:
			Log.d("MediaPlayer", "Pause button was clicked");
		default:
			break;
		}

	}
}
<RelativeLayout xmlns:android="http://schemas.android.com/apk/res/android" xmlns:tools="http://schemas.android.com/tools" android:layout_width="match_parent" android:layout_height="match_parent" > <ImageView android:id="@+id/imageView1" android:layout_width="wrap_content" android:layout_height="wrap_content" android:layout_alignParentBottom="true" android:layout_alignParentLeft="true" android:layout_alignParentTop="true" android:src="@drawable/mp_img" /> <ImageButton android:id="@+id/Playbutton" android:layout_width="wrap_content" android:layout_height="wrap_content" android:layout_alignParentBottom="true" android:layout_alignParentLeft="true" android:layout_marginBottom="80dp" android:src="@drawable/play" /> <ImageButton android:id="@+id/Pausebutton" android:layout_width="wrap_content" android:layout_height="wrap_content" android:layout_alignTop="@+id/Playbutton" android:layout_toRightOf="@+id/Playbutton" android:src="@drawable/pause" /> <ImageButton android:id="@+id/Rewindbutton" android:layout_width="wrap_content" android:layout_height="wrap_content" android:layout_alignParentRight="true" android:layout_alignTop="@+id/Pausebutton" android:src="@drawable/rewind" /> <ImageButton android:id="@+id/Forwardbutton" android:layout_width="wrap_content" android:layout_height="wrap_content" android:layout_alignBottom="@+id/Rewindbutton" android:layout_toLeftOf="@+id/Rewindbutton" android:src="@drawable/forward" /> </RelativeLayout>Why is my application not running?
hey dude u r awsome… I found it is better to search anything in ur blog instead of android blog…
Ver good keep working…
good job… thanks for ur sample
Thanks for the quick instruction, it was much clearer than the Android for Abosolute Beginners book I was using (it’s not bad, just a little, uh, incomprehensible on this topic). Does this mean that each button on a form gets its own listener function? Does this apply to radio group buttons as well?
Hi,
thanks for the article 🙂 I was wondering if I can do this without the xml part. Because i have an array of images and I need to put one of the images to the button. Do I have to create the array in xml or can I write it normally in java? I am quite begginer in xml and the concept of moving from xml to java and back.
Thanks 🙂
I’m really inspired along with your writing abilities as well as with the structure on your weblog. Is this a paid topic or did you customize it yourself? Anyway keep up the nice high quality writing, it is uncommon to look a nice blog like this one nowadays..
You may want to delete this comment. Smells like spam.
nice info..!!
See : http://www.allandroidgadget.com
For Android Gadget Review Portal
Thank’s…
nice