In jQuery, we select an element by id using the # symbol and select elements by class name using the . symbol.
Table of contents:
1. Select an element by ID
To select an element by ID, we use the # symbol followed by the element’s ID.
$('#elementId')
For example, if we have an HTML element with the ID myElement, we can select it with jQuery like this:
$('#myElement')
2. Select elements by Class Name
To select elements by class name, we use the . symbol followed by the element’s class name.
$('.className')
For example, if we have a few HTML elements with the class name myClass, we can select it with jQuery like this:
$('.myClass')
3. HTML example
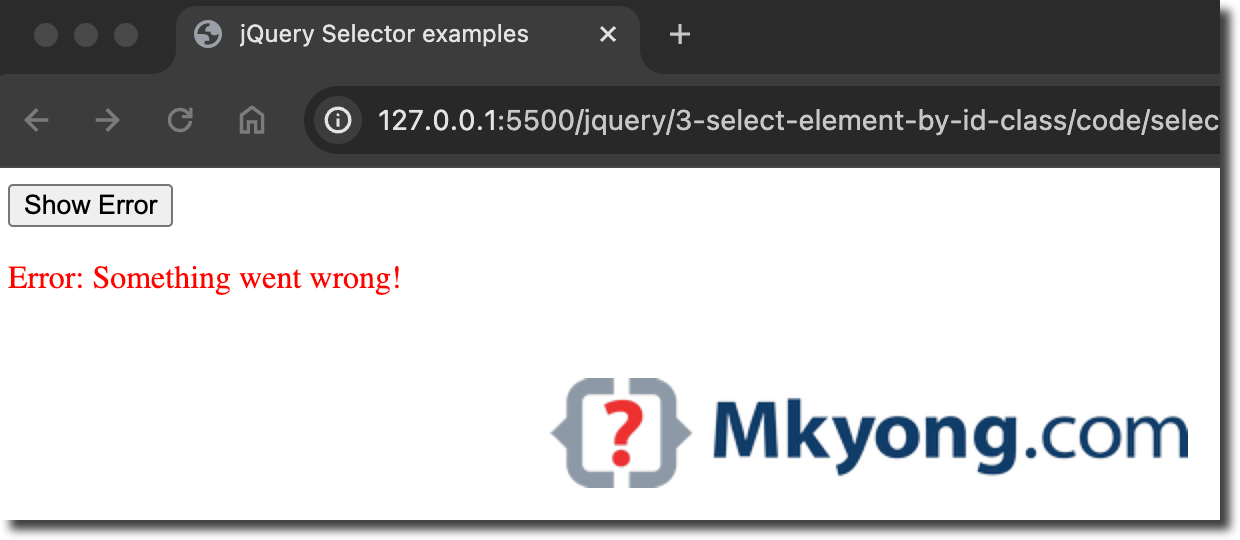
In this example, we create an HTML page with a button and an area where an error message (select by ClassName) can be displayed when we click the button (select by ID).
<!DOCTYPE html>
<html lang="en">
<head>
<meta charset="UTF-8">
<meta name="viewport" content="width=device-width, initial-scale=1.0">
<title>jQuery Selector examples</title>
<script src="https://cdnjs.cloudflare.com/ajax/libs/jquery/3.7.1/jquery.min.js"></script>

<style>
  .error {
      color: red;
  }
</style>

</head>
<body>

<button id="showErrorButton">Show Error</button>

<div class="errorMessage"></div>

<script>
$(document).ready(function() {

  $('#showErrorButton').click(function() {
      // Clear existing error messages
      $('.errorMessage').empty();

      // add class `error`
      $('.errorMessage').addClass('error');

      // Append a new error message
      $('.errorMessage').append('<p>Error: Something went wrong!</p>');
  });

});
</script>

</body>
</html>
Output
When a button is clicked.