This article shows you how to add JUnit 5 in a Gradle project.
Technologies used:
- Gradle 5.4.1
- Java 8
- JUnit 5.5.2
1. Gradle + JUnit 5
1. Add the JUni 5 jupiter engine, and define the useJUnitPlatform() like the following:
gradle.build
plugins {
	id 'java'
	id 'eclipse' // optional, for Eclipse project
	id 'idea'	 // optional, for IntelliJ IDEA project
}

repositories {
	mavenCentral()
}

dependencies {
	testImplementation('org.junit.jupiter:junit-jupiter:5.5.2')
}

test {
	useJUnitPlatform()
}
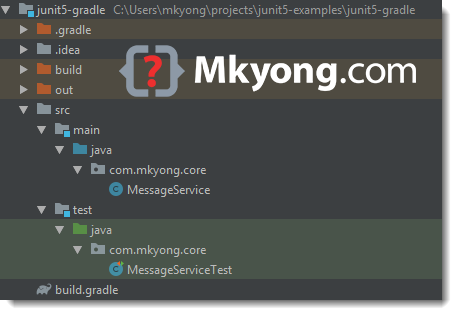
2. Gradle Project
A standard Java project structure.
3. JUnit 5
3.1 A simple unit test example.
MessageService.java
package com.mkyong.core;

public class MessageService {

    public static String get() {
        return "Hello JUnit 5";
    }

}
3.2 JUnit 5 simple Assertions test.
MessageServiceTest.java
package com.mkyong.core;

import org.junit.jupiter.api.DisplayName;
import org.junit.jupiter.api.Test;

import static org.junit.jupiter.api.Assertions.assertEquals;

public class MessageServiceTest {

    @DisplayName("Test MessageService.get()")
    @Test
    void testGet() {
        assertEquals("Hello JUnit 5", MessageService.get());
    }

}
4. gradle test
4.1 Run tests in Gradle.
Terminal
$ cd project
$ gradle test

BUILD SUCCESSFUL in 0s
3 actionable tasks: 3 up-to-date
4.2 If the test is failed, it will display something like this:
Terminal
$ gradle test

> Task :test FAILED

com.mkyong.core.MessageServiceTest > testGet() FAILED
    org.opentest4j.AssertionFailedError at MessageServiceTest.java:13

1 test completed, 1 failed
4.3 gradle test generates the following HTML test report by default:
{project}\build\reports\tests\test\index.html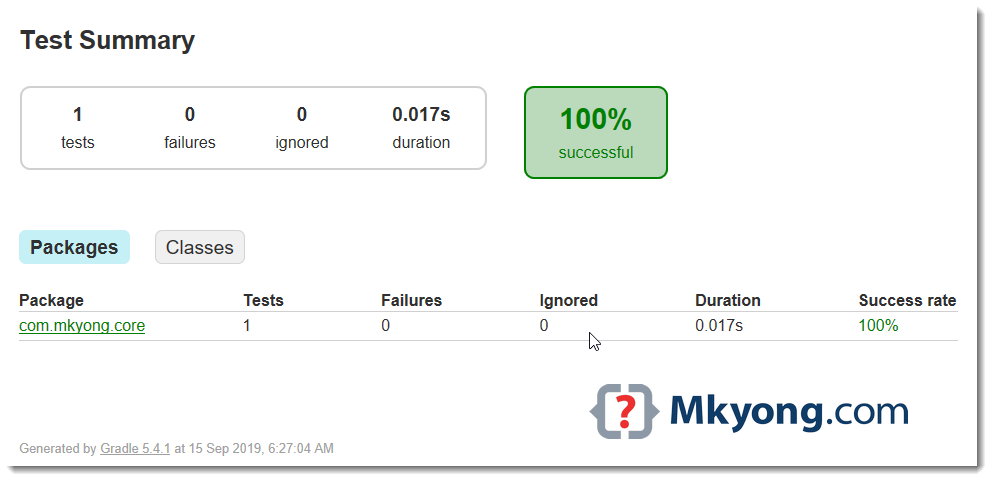
Done.